flaky pie crust recipe
Flaky Pie Crust Recipe: Tips and Tricks for Perfect Results Every Time
Introduction
Pie crust is an essential component of any good pie. A flaky crust can make or break a pie, so getting it right is crucial. Making your own pie crust may seem daunting at first, but with the right ingredients, tools, and techniques, anyone can achieve perfect results every time. This article will provide a comprehensive guide to making flaky pie crust, including tips and tricks to troubleshoot common problems along the way.
Understanding Your Ingredients
Pie crust is made up of just a few simple ingredients: flour, fat, liquid, salt, and sugar. Each of these plays an important role in creating a flaky and tender final product.
The type of flour you use will affect the texture of your crust. All-purpose flour is commonly used and works well for most pies. However, if you want a more delicate crust, you can opt for pastry flour instead.
Fat is what creates the flakiness in a pie crust. There are different types of fats you can use - butter, lard, shortening, or a combination thereof. Butter provides flavor and richness, while shortening or lard adds flakiness. Using a combination of fats can yield a well-rounded result.
Liquid is necessary to bring everything together. Water is typically used for plain crusts while milk or cream can be used for sweeter varieties.
Salt enhances the flavor while sugar rounds out the sweetness in sweet pies.
Tools You’ll Need
Having the right tools on hand will make creating the perfect pie dough much easier.
Essential tools include:
- A large mixing bowl
- A pastry cutter or food processor
- A rolling pin
- A pastry brush
Optional tools that can make the process go smoother include:
- A pastry blender or stand mixer
- Parchment paper or silicone mat for rolling out the dough
- Dough scrapers for cleaning surfaces and transferring dough
- Pie weights or dried beans to use as a weight when pre-baking crusts
Preparing Your Ingredients Correctly
Proper ingredient preparation is crucial to achieving the perfect dough consistency.
Measuring your ingredients accurately is key. Use a kitchen scale if possible, as it will yield more precise measurements.
Chilling your fat and liquid before using them in your dough will help create a flakier result. Cut the butter or shortening into small pieces and chill them until they are firm before using them. Chill the water, milk, or cream as well.
Sifting flour before adding it to your dough will ensure there are no lumps or clumps, resulting in a smooth final product.
Making Your Dough
There are various techniques for mixing pie dough - by hand with a pastry cutter, using a stand mixer, or using a food processor. The goal is to create pea-sized bits of butter or fat dispersed throughout the dry ingredients.
When adding liquid, add it gradually rather than all at once. You want just enough liquid to bring everything together without creating a wet mess. Over-mixing can lead to developing too much gluten and result in a tough crust, so be mindful of this.
Rolling Out and Shaping Your Dough
Flouring surfaces properly when rolling out pie crust can prevent sticking. A silicone mat or parchment paper can make this task easier.
Don’t overwork the dough when rolling it out. Roll it out to the desired thickness, usually about 1/8th of an inch.
When shaping the dough to fit your pie dish, avoid stretching or pulling it, as this can cause shrinkage or cracking during baking. Use a sharp knife to trim any excess dough and leave about a 1-inch overhang for decorative edges.
Baking Your Pie Crust
Preheating your oven is crucial when making pie to ensure even cooking.
Different pies will require different baking times and temperatures. A single-crust pie typically bakes at around 375°F for 45-50 minutes, while a double-crust pie may bake at a higher temperature for a shorter time.
Common mistakes to avoid when baking include overbaking, underbaking, and forgetting to vent the top crust. To prevent overbaking, cover the edges of your crust with foil or a pie shield if they begin to brown too quickly.
Troubleshooting: Common Problems and Solutions
Even with careful preparation, sometimes problems can arise when making flaky pie crusts. Here are some common problems and their solutions:
- Shrinking: If your crust shrinks during baking, you may have stretched it too much when fitting it into the pan. Chill the shaped dough before filling next time.
- Cracking: If your crust develops cracks while being rolled out or shaped into the pan, it may be too dry. Add additional water gradually until you achieve the desired texture.
- Tough crust: Overworked or over-mixed dough can result in a tough crust. Try mixing by hand with a pastry cutter rather than using a food processor for better control.
- Soggy bottom crust: No one likes a soggy bottom! To prevent this common problem, try brushing a thin layer of beaten egg white on the bottom before adding filling. You may also want to pre-bake the crust slightly before adding filling.
- Undercooked crust: If your crust looks pale and undercooked, try baking for a few more minutes or until the edges begin to brown. You may also need to adjust your oven temperature or bake time.
Adding Creative Touches
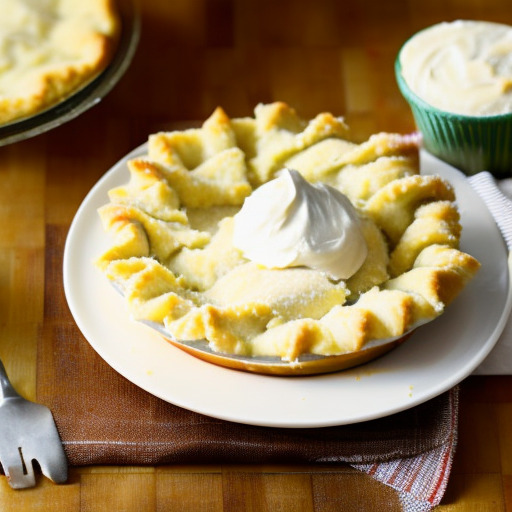
Once you’ve mastered the basics of pie crust, it’s time to have fun with decorative touches. Adding a decorative edge can really elevate the look of your pie. A lattice top is a classic and beautiful option that can be created by weaving strips of dough over the top of your pie filling.
When it comes to fillings, the sky’s the limit! Sweet pies can be filled with fruit, custard, or cream, while savory pies can be filled with veggies, meat, or cheese.
Recipes to Try
Ready to put your newfound knowledge to use? Here are some delicious recipes to try:
Classic Flaky Pie Crust
- 1 ¼ cup all-purpose flour
- 1 stick unsalted butter (cut into small pieces and chilled)
- ½ teaspoon salt
- 4-5 tablespoons ice water
1. In a large mixing bowl, stir together flour and salt.
2. Add butter and cut in using a pastry cutter or food processor until mixture resembles coarse meal.
3. Gradually add water and mix gently until dough comes together.
4. Shape into a ball and wrap in plastic wrap. Chill for at least 30 minutes before rolling out.
Gluten-Free Pie Crust
- 1 ¼ cups gluten-free flour blend
- Pinch of salt
- ½ cup cold butter (cut into small pieces)
- 4-5 tablespoons ice water
1. In a large mixing bowl, stir together flour blend and salt.
2. Add butter and cut in using a pastry cutter or food processor until mixture resembles coarse meal.
3. Gradually add water and mix gently until dough comes together.
4. Shape into a ball and wrap in plastic wrap. Chill for at least 30 minutes before rolling out.
Conclusion
With the right ingredients, tools, and techniques, making flaky pie crusts is easier than you think. The key to success is understanding your ingredients, preparing them correctly, and using proper techniques when making your dough. Remember to have fun with decorative touches and different fillings to create pies that are both beautiful and delicious.
Frequently Asked Questions about Flaky Pie Crust Recipe:
1. How can I make my pie crust flaky?
To achieve a flaky pie crust, it is important to use very cold ingredients such as butter and water. Additionally, refrain from overworking the dough and let it rest in the fridge for at least 30 minutes before rolling it out.
2. Can I use margarine instead of butter for my pie crust?
Although some people use margarine as a substitute for butter, it may affect the outcome of the pie crust’s texture and taste. Butter has a high-fat content, which makes the crust more tender and flaky while maintaining its rich flavor.
3. Should I pre-bake my crust before filling it?
This depends on the type of pie you are making and its fillings. In general, if your pie has a custard-like filling, it’s best to pre-bake it to prevent soggy or undercooked pastry.
4. How thin should I roll out my pie crust?
Aim to roll your crust to about ⅛ inch thickness. This thickness will allow proper heat distribution during baking and avoid any undercooked or burnt areas.
5. Can I freeze my pie dough ahead of time?
Yes! Pie dough can be made in advance and frozen up to three months. Wrap it tightly in plastic wrap or an airtight container to avoid air exposure that will cause freezer burn.
6. How do I crimp my pie edges?
- Gently fold the excess dough under itself all around the border, creating a raised edge
- Using your thumb and index finger, pinch the raised dough to create small flutes
- Repeat this step until you’ve completed the entire border of the pie
7. What other ingredients can I add to my pie dough for flavor?
- Cinnamon or nutmeg for spice lovers
- Vanilla extract for a hint of sweetness
- Orange or lemon zest for a citrusy touch
- Sugar or honey for a sweeter crust
There you have it! Follow these tips and tricks to achieve a perfect flaky pie crust every time.