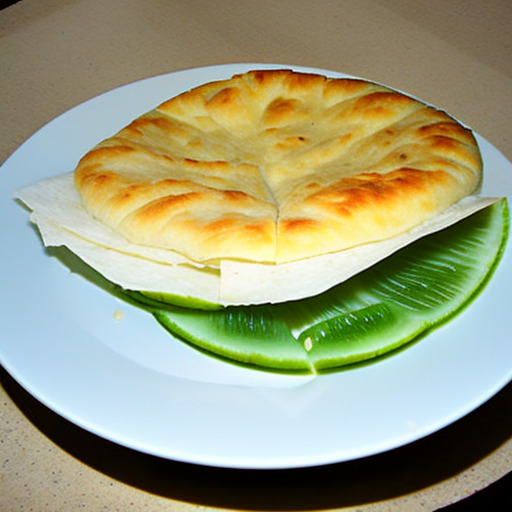
pita bread recipe
How to Make Delicious Homemade Pita Bread: A Comprehensive Recipe Guide
Pita bread is a popular staple in various Middle Eastern, Mediterranean, and Balkan cuisines. This versatile bread is perfect for any meal of the day, whether it’s breakfast, lunch, or dinner. It can be used as a wrap, sandwich pocket, or dipper for your favorite dips and spreads. The best part is that it’s easy to make at home. In this comprehensive recipe guide, we will walk you through the steps of making pita bread from scratch.
Introduction
Pita bread has been around for thousands of years and is still enjoyed by many today. I first tried pita bread when I was traveling in the Middle East and was immediately hooked on its unique flavor and texture. Since then, I have made pita bread at home several times, and it never fails to impress my family and friends.
Making your own pita bread not only tastes better than store-bought ones but also makes an excellent base for sandwiches or salads. Whether you’re new to baking or an experienced baker, this recipe guide will help you achieve perfectly soft and fluffy pitas every time.
Equipment Needed
Before we start with the recipe, let’s make sure we have all the necessary equipment ready. Here’s a list of what you’ll need:
- Mixing bowls
- Measuring cups and spoons
- A stand mixer with a dough hook attachment (optional but preferred)
- A rolling pin
- A cast-iron skillet or a baking stone
- Tongs
- A pastry brush (optional)
If you don’t have a stand mixer, don’t worry! You can still knead the dough by hand, but it may take a little longer.
Ingredients
Now that we have all the necessary equipment let’s gather our ingredients:
- 3 cups of all-purpose flour
- 1 and 1/2 teaspoons of salt
- 1 tablespoon of granulated sugar
- 1 tablespoon of instant yeast
- 1 and 1/4 cups warm water
- 2 tablespoons of olive oil
Brief overview of what each ingredient does:
- The flour is the base of the dough.
- The salt adds flavor to the bread.
- The sugar helps activate the yeast.
- The yeast causes the dough to rise.
- The warm water is necessary for activating the yeast.
- The olive oil adds flavor and moisture to the bread.
Tips on where to find some more uncommon ingredients:
If you’re having trouble finding instant yeast, you can use active dry yeast instead. However, you’ll need to activate it first by mixing it with warm water and sugar before adding it to the rest of the ingredients. Occasionally, grocery stores may also sell fresh yeast, which is a great option if you plan on making bread regularly.
Preparing the Dough
Now that we have all the ingredients let’s mix them all up:
-
Step 1: Preparing The Dough
a. In a large bowl, mix together flour, salt, sugar, and instant yeast.
b. Add in olive oil to the water and then pour into the large bowl.
c. Mix all the ingredients, by hand or with a dough hook attachment on your stand mixer, until you form a smooth, elastic dough.
Tips on kneading and resting the dough:
- You can knead the dough by hand for about 10-12 minutes or use a stand mixer with a dough hook attachment for about 6-8 minutes on low speed.
- Dough should be smooth, shiny, stretchy, and not sticking to your hands.
- If the dough is too dry, add a tablespoon of water at a time. If it’s too sticky, add flour, one tablespoon at a time.
- Once the dough has been kneaded, place it in a lightly greased bowl and cover it with plastic wrap or a damp kitchen towel. Allow it to rise in a warm place for about an hour or until doubled in size.
Variations:
If you want to make whole wheat pita bread, substitute half or all of the all-purpose flour with whole wheat flour. Keep in mind that whole wheat flour will produce denser pitas than all-purpose flour.
If you want to make gluten-free pita bread, use gluten-free all-purpose flour instead of regular flour. However, keep in mind that gluten-free bread may not puff up as much as regular pita bread since it lacks gluten.
Shaping and Cooking the Pita Bread
Now that we have our dough risen let’s get started:
-
Step 2: Shaping and Cooking The Pita Bread
a. Preheat your oven to 500°F (260°C) or, if using a skillet, preheat it over medium-high heat.
b. Lightly flour your work surface and divide the dough into eight equal pieces.
c. Roll each piece into a ball and let them rest for about 10 minutes covered with a damp towel or plastic wrap.
d. Take one dough ball at a time and flatten it with your hand or a rolling pin on a lightly floured surface until it is about 1/4 inch thick.
e. Place the flattened dough onto the skillet or baking stone and cook for 2-3 minutes on each side, or until the bread puffs up and has golden brown spots. Use tongs to flip the bread over.
f.Brush bread with olive oil and season with salt (optional).
Tips for rolling out perfectly round dough:
- Flour both sides of the dough before rolling.
- If you’re having trouble rolling out perfectly round circles, try using a circular cookie cutter as a guide.
- The thickness of the pita affects how much it will puff up during cooking. For softer pitas, roll them out thicker.
Explanation on how to cook the pitas in a skillet, oven, or grill:
- If you’re using an oven, place the rolled-out dough directly onto the baking stone or cookie sheet.
- If you’re using a skillet, make sure to heat it up well before adding the flattened dough. Place the pita on dry skillet over medium-high heat after removing excess flour that can burn quickly.
- If you’re using a grill, place the flattened dough directly onto the grill grates over medium-high heat.
- When the bread begins to puff up, use tongs to flip it over and cook for another minute or two.
- Brushing the pita with olive oil and/or seasoning with salt is optional but adds flavor.
Troubleshooting:
List of common errors that can occur:
- If the dough is too dry or tough, try adding more water.
- If the dough isn’t rising, check to make sure the yeast is fresh and hasn’t expired.
- If the dough rises too quickly or dramatically, try using a cooler room temperature for rising so that yeast doesn’t overcook.
- If the pitas don’t puff up, try rolling them out thinner or increasing the heat on your skillet or oven.
Serving Suggestions
Now that we have our perfectly cooked pita bread let’s see suggestions on how to serve it:
- Cut into triangles and serve as a dipping bread with hummus, baba ghanoush, tzatziki, or other dips.
- Use as a wrap for your favorite sandwich fillings like chicken shawarma, falafel, or gyros.
- Serve as a side with lentil soup, salad, kebab meat, or anything else your heart desires!
Tips on storage and reheating leftover pita bread:
- Pitas can be stored in an airtight container at room temperature for up to three days.
- Pitas also freeze well! To thaw them when you’re ready to use them, warm them up in the microwave or oven for a few seconds before serving.
- If re-heating pita bread in the oven, wrap them in foil and place on a baking sheet.
Benefits of Homemade Pita Bread
Explanation on why buying store-bought pita bread is not as good:
While store-bought pita bread can be convenient, it doesn’t compare to homemade. Most store-bought pitas are filled with preservatives and artificial flavorings. Additionally, homemade pitas taste fresher and more flavorful than store-bought options.
Discussion of nutritional value and health benefits:
Not only does homemade pita bread taste great, but it’s also nutritious. Pita bread is traditionally low in saturated fat and sugar while being high in fiber, vitamins B and E minerals like selenium and manganese home-made ones usually have less salt and chemical additives than bought ones. Choosing to make your own pita bread means you control the ingredients, allowing you to create a healthier alternative that aligns with your dietary needs.
Conclusion
Overall, making pita bread from scratch is a fun and rewarding process that results in delicious homemade bread that can’t be beaten by the store-bought sandwich pockets. By following our comprehensive recipe guide, you’ll soon be enjoying perfectly cooked pitas that can elevate any meal with their unique flavor, aroma, and texture.
Final Thoughts:
Making your own fresh pita bread at home is not only easy but also allows you to add your favorite flavors or adjust it according to your dietary needs. Experimenting with different flours or seasoning combinations offers endless opportunities for this versatile bread. Plus, there’s something satisfying about creating a delicious dish from scratch using only simple ingredients that everyone will enjoy. Try out our recipe and let us know how your pita bread comes out!
Frequently Asked Questions About Pita Bread Recipe
1. What are the ingredients needed for making pita bread?
The ingredients needed for making pita bread are as follows:
- All-purpose flour
- Warm water
- Instant yeast
- Granulated sugar
- Kosher salt
- Olive oil
2. Is it hard to make pita bread at home?
No, it is not hard to make pita bread at home. With this simple recipe and some practice, you can easily make homemade pita bread that rivals those from a bakery.
3. Can I make pita bread without a stand mixer?
Yes, you can make pita bread without a stand mixer. You can mix the dough by hand or use a hand mixer to knead the dough.
4. Do I need a special oven to bake pita bread?
No, you do not need a special oven to bake pita bread. You can use a regular home oven or even a toaster oven to bake the flatbreads.
5. How do I know when the pita bread is cooked?
You will know when the pita bread is cooked when it has inflated like a balloon in the oven and has turned golden brown on top.
6. How should I store the leftover pita bread?
You can store leftover pita bread in an airtight container or resealable bag at room temperature for up to three days or freeze them for up to two months.
7. Can I use whole wheat flour instead of all-purpose flour?
Yes, you can use whole wheat flour instead of all-purpose flour. However, the texture of the bread may differ slightly, and you may need to adjust the amount of liquid used in the recipe.