rye bread recipe
Rye Bread Recipe: A Step-by-Step Guide
Rye bread has a rich history dating back to the Middle Ages. It was a staple food in Northern and Eastern Europe, where wheat was less available than rye. Today, it remains a beloved bread around the world for its unique flavor and health benefits.
Making your own rye bread is an excellent way to enjoy this tasty and nutritious bread while also experimenting with different flavors and styles. In this article, we’ll provide a step-by-step guide on how to make your own delicious rye bread at home.
Benefits of Consuming Rye Bread
Before we dive into the recipe, it’s worth noting some of the benefits of consuming rye bread. Firstly, it is high in fiber which makes you feel full longer and regulates bowel movements. Secondly, it contains antioxidants that can help lower the risk of chronic diseases. And finally, it has a lower glycemic index than white bread which means it doesn’t raise blood sugar levels as fast making it ideal for those who want to regulate their blood sugar levels or avoid insulin spikes.
Why Making Your Own Rye Bread is Worth It
There are several reasons why making your own rye bread is worth considering instead of buying it from a bakery or supermarket.
Firstly, you have control over the ingredients used, allowing you to make healthier choices such as using organic flour or reducing salt content. Secondly, homemade bread tastes better than store-bought due to the lack of preservatives added in commercial food production. And lastly, making your own rye bread can be a therapeutic activity that allows you to disconnect from technology and focus on something as simple yet rewarding as baking bread.
Now let’s get into the recipe.
Ingredients and Tools
Ingredients
- 500g rye flour
- 250g bread flour
- 400g water
- 12g salt
- 200g sourdough starter
- Optional: seeds such as caraway or sesame for additional flavor
Tools
- A large mixing bowl
- A kitchen thermometer
- A sharp knife
- A proofing basket or a large bowl lined with a floured towel
- A dutch oven or baking stone and steam pan
Whenever possible, opt for high-quality ingredients to ensure the final product is as delicious as possible. Brands such as Bob’s Red Mill and King Arthur Flour are trusted suppliers of excellent flours.
Preparing the Rye Sourdough Starter
Sourdough starters are natural leavening agents that give bread its distinctive tangy flavor and chewy interior. If you don’t have your own starter, you can easily make one from scratch using our guide (put link here).
What is Sourdough Starter?
A sourdough starter is a mixture of flour and water that contains wild yeast and bacteria from the environment that surround us. This mixture is fermented over time, typically taking seven days to mature, and used to leaven bread dough.
Importance of a Good Rye Sourdough Starter
A good sourdough starter is crucial to baking delicious rye bread. It acts as both a natural leavening agent and a flavor enhancer. A well maintained and healthy starter will give your bread great structure, crackles crust, and is rich in flavor.
Steps to Create a Rye Sourdough Starter
Here’s how to create your own rye sourdough starter to use in this recipe.
Day 1: In a clean jar, mix 50 grams of rye flour and 50 grams of room temperature water. Cover with a cloth or cheesecloth and let sit at room temperature for 24 hours unbothered.
Day 2: Discard half of the mixture in the jar (about 50g) to avoid it from overfeeding. Add 50g of rye flour and 50g of water to the remaining mixture and stir very well until creamy. Cover with a cloth and set aside for another 24 hours.
Day 3-7: Repeat the process you did on Day 2.
Note: During this stage, it may not look like much has happened, but you might notice small bubbles forming or a slightly sour smell developing. This means that fermentation is taking place!
Before using the starter for baking bread, it should be fed regularly every four to seven days to keep the yeast healthy and alive.
Mixing the Dough
Now that you have your sourdough starter ready, let’s move on to mixing the dough.
Step one: Combine the bread flour, rye flour, salt, and optional seeds in a large mixing bowl.
Step two: Add about half of the water (200g) and use your hands or a wooden spoon to combine all ingredients gently.
Step three: Add your sourdough starter to this mixture along with rest of the water slowly. Mix everything together until no dry pockets remain.
Tips for Kneading and Shaping the Dough
Kneading the dough takes practice, but the process is essential in developing gluten in the bread which will give it a strong structure. The following are tips for kneading and shaping the dough.
- Turn out onto a lightly floured surface, fold from one side to the other and push back a few times.
- Avoid adding too much flour that can make your dough dry, If you find it’s sticking to your hands or work surface, use a little olive oil instead of flour.
- When you have achieved an elastic but firm texture that bounces back when poked, and if you like, add some additional seeds or herbs of your choice for extra flavor.
Note: Rye dough tends to be stickier than wheat dough initially so don’t despair if it feels dense and hard to manage. It needs that extra care.
Proofing the Dough
Proofing refers to giving the dough enough time and warmth for the yeast activity to cause fermentation. This process allows for the bread to rise and develop lightness to its crumb structure before baking.
Step One: Fold your well-kneaded dough into a ball shape.
Step Two: Place it in a proofing basket or large bowl lined with a floured towel to rise.
Step Three:Cover with plastic wrap tightly and leave it at room temperature somewhere that is warm with sufficient moisture in the air.
Length of Time Needed for Proofing
The length of time needed for proofing depends on various factors such as humidity, temperature, air pressure, and age of sourdough starter.
Plan between 6-12 hours for total proofing time until the dough has expanded to close to double its original size. You can test its readiness by checking whether indentations made on the surface of the dough remain depressed.
Temperature Requirements
Rye Bread dough prefers a warmer environment than White Bread dough. Aim for an ambient room temperature of 24-27°C (75-80°F) for optimal proofing conditions.
Signs that the Dough is Ready for Baking
The dough should be visibly bigger (roughly doubled in size), when you poke it, it should respond with a gentle bounce back, the surface should look slightly dry-almost like cracked dirt- and there should be plenty of visible bubbles on top.
Preparing to Bake
Before you preheat your oven, there are a few things to keep in mind.
Step One: Turn your oven on and let it preheat. Set at 250°C (475°F) and place your baking stone or Dutch oven inside to heat up.
Step Two: Prepare your loaf to remove from the bowl or basket where it was proofed. Gently tip the bowl or basket upside down onto a piece of baking parchment so that your loaf comes out without losing its shape.
Step Three: Create small openings on the surface of the bread with a sharp knife, so that the bread will rise without breaking open on one single side.
Baking the Bread
Now we’re ready to bake our delicious rye bread.
Step One: Carefully slide your loaf (on parchment paper) onto your hot Dutch oven or baking stone with steam pan/kettle at the bottom (which helps create more moisture in baking which translates to better crust formation).
Step Two:Bake it for 50-60 minutes at 250°C (475°F) or until the crust is visibly hard and has deep colors.
Tips for Achieving a Crispy Crust
- Spraying water on loaf before baking from a misting bottle or steam pan, brings humidity to the oven and creates a hard crust.
- You can add some ice cubes in the steam pan as well to aid humidity in the oven when baking.
Cooling and Storing
Step One: Allow the bread to cool entirely before cutting.
Step Two:Avoid storing freshly baked Rye bread in an airtight container, as its moisture will cause the bread to become soggy and stale. Cover it up with a soft towel or linen which will allow air circulation but blocking out direct light.
Troubleshooting Common Issues
Rye bread is generally forgiving, but these tips may help when issues arise.
Identifying Potential Issues with Your Dough
- If your dough is too thin or flat after proofing, it’s possible that not enough flour was used, and it needs more time to develop gluten.
- If your dough didn’t rise as expected, you may have overproofed your dough (which means the yeast has exhausted its resources) or underproofed it.
- If you’re struggling to get that signature rye density, It’s possible that the humidity in your environment has played a role in toughening the crust by reducing its water content. Try adding some steam while baking so that it retains moisture during cooking which will help create softer crumb texture.
Solutions for Common Dough Issues
Here are solutions for common issues you might experience with your rye bread dough:
- For too flat bread, try adding more flour in the recipe, kneading longer to develop gluten, or reducing the proofing time.
- If your bread didn’t rise or appears weighed down, try proofing it again for a longer period, which can help give yeast time to grow and the dough to become less dense, or Try using fresher starter or increase the percentage of starter used in the recipe.
Rye Bread Recipes
Here’s a classic rye bread recipe with variations you can try.
Classic Rye Bread Recipe
Ingredients:
- 500g rye flour
- 250g bread flour
- 400g water
- 12g salt
- 200g sourdough starter
Instructions:
- Mix all dry ingredients together in a bowl.
- Slightly heat water and stir into the dry ingredients along with sourdough starter to form a soft dough. Knead for about 10 minutes until smooth.
- Gently shape the dough into an oval or round form and place it in prepared proofing basket, cover with a damp tea towel and leave to rest until risen.
- Note the rest time may vary depending on the environment, aim for about 45 minutes.
- Bake in a preheated oven at 250°C (475°F) for about 50-60 minutes.
- Cool before serving.
Variations on Traditional Rye Bread
Here are several variations you can try.
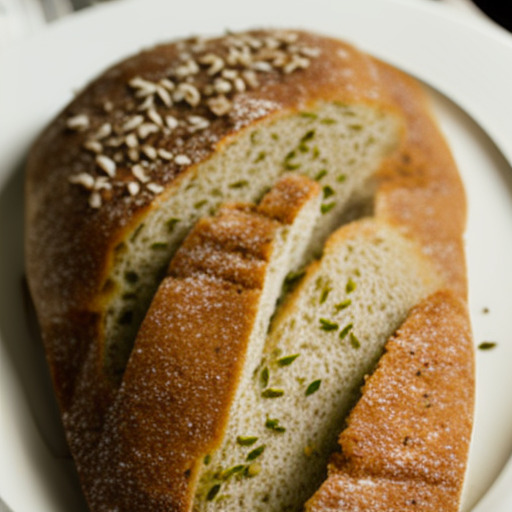
- Seeded Rye Bread: Add a mix of sesame seeds, flaxseeds, pumpkin seeds, and sunflower seeds to the dough when mixing.
- Dark Rye Bread: Replace 50% of the rye flour with pumpernickel flour.
- Caraway Rye: Add a teaspoon of ground caraway seeds to the dough when mixing.
Serving Suggestions
Enjoy your freshly baked rye bread with various accompaniments.
- Butter or margarine spread over a thick slice accompanied with cheese or cold cuts; perfect for sandwiches.
- A fresh salad topped with crisp-bread croutons made from stale Rye bread.
- Toast your slices of bread and serve it alongside hot soup for added texture.
Creative Ways to Incorporate Leftover Rye Bread into Meals
If you make too much bread or have some leftover slices, there’s no need to waste it. Here are some clever ideas for using up your excess rye bread:
- Breadcrumb coatings - Grind leftover slices into breadcrumbs, then use it to coat chicken/turkey/fish sticks.
- Rye bread pudding - Use stale rye bread in place of white bread for a delicious savoury pudding with eggs, cheese, vegetables and baking cream.
- Pizza crust - try replacing regular pizza crust with stale rye bread as a nice alternative for extraordinary taste and nutritional value.
Conclusion
Rye bread is a versatile and tasty addition to any diet, offering numerous health benefits and unique flavor. By making your own rye bread at home, you can experiment with different ingredients, create variations, and enjoy the therapeutic process of baking. With this step-by-step guide, you can be confident in producing a delicious loaf of fresh rye bread that your friends and family will love.
Frequently Asked Questions About Rye Bread Recipe
1. What is rye bread?
Rye bread is a type of bread made from flour that is primarily made from rye grains. It has a distinctive texture and flavor that sets it apart from other types of bread.
2. Is rye bread healthier than white bread?
Yes, rye bread is generally considered to be healthier than white bread because it contains more fiber and nutrients. It is also lower on the glycemic index than white bread, which means it won’t cause your blood sugar to spike as much.
3. Can I make rye bread at home?
Yes, you can definitely make rye bread at home. It may take a bit of practice to get it right, but there are plenty of recipes available online that you can try.
4. What ingredients do I need to make rye bread?
- Rye flour
- Bread flour
- Water
- Yeast
- Salt
- Sugar or honey (optional)
- Olive oil or butter (optional)
5. How do I make rye bread?
- Mix together the flours and salt in a large bowl.
- Add the yeast and sugar (if using) to warm water and let sit for a few minutes until foamy.
- Add the water-yeast mixture to the flour mixture and mix until a dough forms.
- Knead the dough for a few minutes, then let it rise in a warm place until doubled in size.
- Punch down the dough and shape it into a loaf or rolls. Let it rise again until doubled.
- Bake in a preheated oven at 375°F for 30-40 minutes or until the bread sounds hollow when tapped on the bottom.
- Let cool before slicing and serving.
6. Can I add other ingredients to my rye bread?
Yes, you can add other ingredients to your rye bread to give it extra flavor and texture. Some popular additions include caraway seeds, chopped onions, grated cheese, or chopped nuts and dried fruits.
7. How should I store my rye bread?
Rye bread is best stored in an airtight container or bag at room temperature. It will keep for several days this way, but if you want to keep it longer you can freeze it for up to three months.