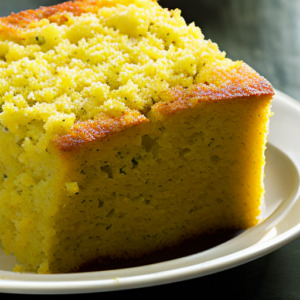
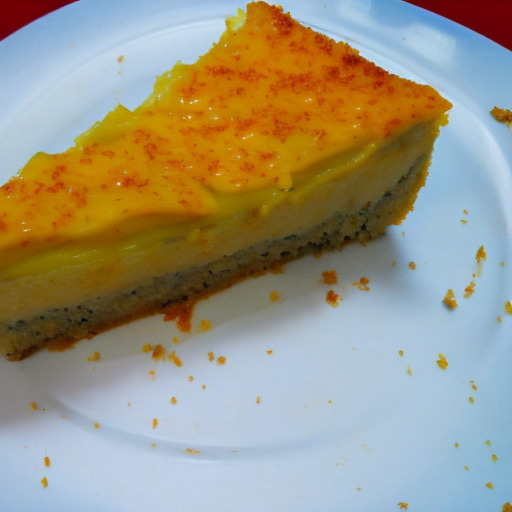
traditional polish cheesecake sernik recipe
Traditional Polish Cheesecake Sernik Recipe
Introduction
If there is one dessert that is synonymous with Polish cuisine, it’s cheesecake sernik. This buttery and creamy dessert has been loved by generations of Poles and remains an essential dish during special occasions.
Sernik originated in Ancient Rome but became popular in Poland during the sixteenth century. At the time, it was a luxury food reserved for nobility. Over time, the recipe evolved to include local ingredients such as cheese curds (twarożek) and local berries like wild blueberries or raspberries.
Serve it with a cup of coffee or tea, and you’ll have a dessert that will make you appreciate the simple things in life.
Ingredients
To prepare traditional Polish cheesecake sernik for 10 people, here are the ingredients you’ll need:
- 900g cheese curds (twaróg)
- 1 cup granulated sugar
- 1/2 tablespoon of vanilla extract
- 8 tablespoons of unsalted butter
- 6 large eggs
- 1/4 cup all-purpose flour
- A pinch of salt.
Ingredient explanation:
Cheese curd is the star ingredient in this recipe, and without it, there wouldn’t be any cheesecake sernik. Twaróg is a type of fresh cheese curd that can be bought at most grocery stores. It has a unique taste and texture that stands out in this dessert.
Sugar gives sweetness to the dessert; it also helps to stabilize the cheesecake and allow it to bake evenly.
Vanilla extract adds flavor to the dessert, and the butter helps create a smooth consistency.
Eggs have a binding effect on the cream cheese mixture — they keep the cakes from falling apart.
Flour serves as a thickening agent for the sernik and helps stabilize it during baking.
Finally, salt enhances the overall flavor of the cheesecake.
Substitution
For this traditional cheesecake sernik recipe, it’s best to stick with the original ingredients. However, if you are unable to find cheese curd, ricotta or cottage cheese are suitable substitutes.
Equipment
To make Polish cheesecake sernik, here’s what you’ll need:
- A 10-inch springform pan
- Electric mixer or hand mixer
- Bowl and measuring cups
- Parchment paper or silicon mat
- Baking tray and oven.
Equipment explanation:
The springform pan is recommended to prepare this dessert because it makes it much easier to remove the cake from the dish without damaging it.
An electric mixer is useful for making sure all your ingredients are well blended. Still, if you don’t have one, a hand mixer works just as well.
Baking parchment paper or silicon mat can be used to line the bottom of the pan to prevent sticking and makes cleaning up a lot easier.
Preparation
To prepare this delicious dessert, follow these easy steps.
Preparing The Crust:
- Preheat oven to 350°F/175°C and melt butter then let it cool down.
- Coat an almost 10-inch springform pan with melted butter, ensuring that all edges and corners are covered. Then cover the bottom of the pan with parchment paper.
- In a bowl, add flour and egg yolks, mix well together, then pour melted butter into the mixture.
- Stir to combine all ingredients until you have a smooth consistency.
- Add salt and keep stirring.
Once everything is mixed, pour this mixture over prepared springform pan.
Preparing The Filling:
- In a separate bowl, add cheese curd, eggs, sugar and vanilla extract. Use an electric mixer to whisk them until blended well.
- Add flour and mix everything for another 2 minutes or until fully mixed together.
- It should be smooth and pliable enough to pour over your prepared crust.
Baking Sernik
To bake the cheesecake sernik correctly, follow these steps:
Preparation Before Baking:
- Preheat the oven for approximately 10 minutes at 350°F/175°C
- Cover the outside of the springform pan with aluminum foil to prevent leakage while baking.
- Bake sernik for about 45-50 minutes.
Check after 40 minutes by inserting a toothpick; if it comes out clean without batter sticking on it, that means your sernik is done.
Baking time:
Baking time varies depending on oven models; it’s best to check if you see brown color on top of sernik after 40 minutes.
Flavor Variations
Polish cheesecake sernik can easily be customized to fit your specific taste buds; here are some of the variations that you can try:
Adding Fruits Or Jams:
Adding fruit or jam to your sernik will give it a fruity taste. Popular fruits used in this variation include raspberries, blueberries, or strawberries. Here’s how it’s done:
- After your initial mixture is done prepare by pouring it over the crust put your desired fruit or jam on top before continuing with baking.
- Add an extra spoonful of sugar to balance out the tartness of some fruits.
Chocolate Sernik:
Another variation of sernik is Chocolate Sernik. Here are the ingredients, and steps on how to prepare one:
- Add 200g of melted chocolate into cheese curd mixture by whisking using a mixer.
- Add cocoa powder(2tbsp) then mix for additional 2 minutes or until fully blended.
- Bake in oven at 350°F/175°C until set then remove from oven and let cool for 10 minutes before serving.
Unique Sernik Recipes From Different Regions Of Poland
In Poland, no two regions make their cheesecakes the same way, and each region has its unique twist on the recipe. Let’s look at two examples:
Kashubian Sernik :
Making a traditional Kashubian sernik requires adding honey, nuts, and raisins to the filling mixture:
For this recipe, you’ll need:
- 9 eggs
- 500gr flour
- 250gr unsalted butter
- 1/2 tablespoon salt
- Honey (1 cup)
- Raisins (1 cup)
- Nuts(1 cup).
Steps:
- Mix butter, flour and salt together until you have a crumbly mixture. Add eggs, mix well until everything is combined.
- Add cheese curd, honey plus raisins and nuts then mix thoroughly.
- Pour the mixture over your prepared crust before baking at 350°F/175°C
- The ideal time for baking Kashubian sernik is about an hour and fifteen minutes.
Krakowian Sernik:
Krakowian sernik has no crust, and rather than being baked in a springform pan, it’s baked directly on parchment paper.
Ingredients for this recipe include:
- 3 cups of cheese curds
- 7 tablespoons of granulated sugar
- 2 teaspoons of vanilla extract
- 1 teaspoon of lemon zest
- 3 eggs (separate egg yolks and whites)
Steps:
- Mix cheese curds, sugar, vanilla extract and egg yolks until they’re all well-combined.
- In a separate bowl, whisk the egg whites then fold it into the cheese curd mixture.
- Pour into a baking sheet lined with parchment paper. Bake at 350°F/175°C for about 25-30 minutes or until nicely browned over the top.
Common Mistakes To Avoid While Making Sernik
While preparing sernik might seem simple, it can be quite easy to make some common mistakes that can ruin your entire dessert. Here are some things to keep in mind:
- Overbeating batter while mixing ingredients can toughen your cheesecake, and it might not bake evenly and might result in cheesecakes breaking apart during baking.
- If you don’t cover your cheesecake with foil while baking, this can result in the top browning too quickly or developing hot spots.
When preparing the cheesecake sernik recipe, keep in mind that it can take some practice to get everything just right.
Serving Tips & Decoration Ideas
Prepare a perfect sernik; here are decoration ideas that will impress your guests:
- Before serving, dust the top with powdered sugar for extra sweetness
- You can add some berries to taste.
- Add a dollop of whipped cream on top of the sernik for a light and fluffy taste.
- To make it fancier, chocolate chips or nuts can be added at many levels.
Serve sernik chilled, and it’ll last long enough for you to enjoy more than one slice!
Time before Serving:
Serve Sernik Cheesecake at least after 2 hours from taking out of the oven.
Conclusion
If you’re looking to try your hand at making an authentic Polish dessert recipe, then cheesecake sernik is a perfect place to start. We’ve gone through everything from ingredients to equipment to tips on serving to help you learn how to make it perfectly.
Sernik has become such an essential dessert that is present during festive occasions such as Christmas or Easter festivities in Poland. Therefore, bringing this age-old recipe into your kitchen is sure to be a hit with friends and family alike.
7 FAQs about Traditional Polish Cheesecake Sernik Recipe
1. What is traditional Polish cheesecake sernik?
Traditional Polish cheesecake sernik is a delicious and creamy dessert that combines a rich cheese filling with a crumbly and buttery crust. It’s a classic dessert in Poland and often served on special occasions, such as Easter or Christmas.
2. What ingredients do I need to make traditional Polish cheesecake sernik?
- Cream cheese
- Sour cream
- Sugar
- Eggs
- Vanilla extract
- Lemon zest
- Flour
- Baking powder
- Salt
- Butter
- Graham cracker crumbs
3. How do I make the crust for traditional Polish cheesecake sernik?
Mix butter and graham cracker crumbs together until it becomes moist like sand. Spread the mixture to the bottom and sides of a springform pan and press gently using your fingers or the back of a spoon. Bake for around 10-12 minutes until it turns golden brown.
4. How do I make the filling for traditional Polish cheesecake sernik?
- Cream sugar, sour cream, and cream cheese together in a large bowl until it’s smooth.
- Mix eggs, flour, salt, baking powder, vanilla extract, and lemon zest in another bowl.
- Slowly add the egg mixture to the cream cheese mixture and beat in low speed until combined.
5. How long do I bake traditional Polish cheesecake sernik?
Bake for 1 hour at 325°F. Check after an hour, then continue baking another 10-15 minutes or until it’s set and has a slight jiggle at its center.
6. Can I add any variations to this recipe?
Yes, you can vary the traditional Polish cheesecake sernik recipe by adding fruit toppings, like strawberry or blueberry compote, or chocolate chips. You can also substitute some of the ingredients to make it healthier, like using Greek yogurt instead of sour cream or low-fat cream cheese.
7. How do I store traditional Polish cheesecake sernik?
Store in the refrigerator covered with plastic wrap for up to three days. It also freezes well if wrapped securely with aluminum foil or freezer bags and stored up to three months.