
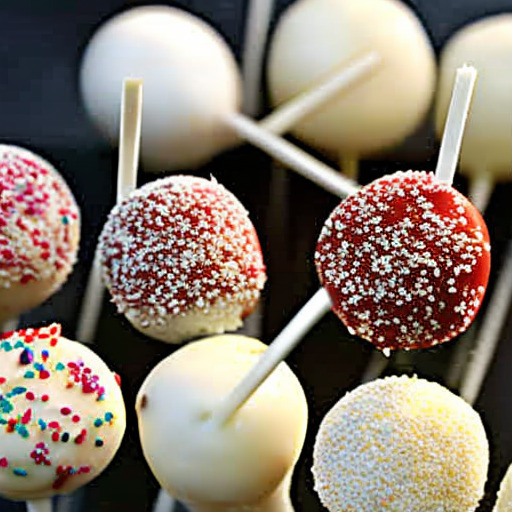
The Ultimate Guide to Making Cake Pops
Cake pops are a delightful invention that has swept the baking world. These small, bite-sized treats are perfect for any occasion - from birthdays to weddings and even baby showers. They are not only visually pleasing, but they can also satisfy your sweet tooth without being overwhelming. In this ultimate guide, we will take you through every step of the process of making cake pops.
Introduction
Cake pops have been increasing in popularity over the years, and it’s not hard to see why. These treats are perfect for those who want a smaller portion of cake than a whole slice or just want something fun and easy to eat. A cake pop consists of a small ball of cake mixed with icing or frosting on top of a stick like a lollipop.
In this ultimate guide, we will help you make perfect cake pops. We will go over selecting ingredients, equipment and tools needed as well as preparation instructions for each step.
One important benefit of making cake pops at home is that you can control the quality of the ingredients used. You can use organic ingredients or manufacture them yourself for allergen safety, something that might be challenging if you rely on store-bought treats.
Ingredients
The first step in making delicious cake pops is selecting high-quality ingredients. Here’s what you’ll need:
Cake Batter Ingredients:
- All-purpose flour
- Sugar
- Baking powder
- Milk or buttermilk
- Eggs
- Salt
- Butter at room temperature or vegetable oil depending on recipe
- Vanilla extract
Frosting or Icing:
- Powdered sugar or icing sugar
- Unsalted butter at room temperature (or cream cheese, mascarpone, etc.)
- Flavorings like vanilla extract, almond extract, or lemon extract
- Milk or heavy cream
Equipment and Tools
Here are the necessary pieces of equipment and tools:
Baking essentials:
- Electric mixer (handheld or stand mixer)
- Measuring cups and spoons
- Baking pans or rimmed baking sheets
- Parchment paper or silicon baking mat
- Cooling rack
Specific cake pop making tools:
- Cake pop pan (optional)
- Lollipop sticks (4-6 inches long)
- One small plastic bag with a tiny hole opening for piping (or you can use a piping bag fitted with a round tip)
- Spray bottle of water for moistening the cake balls as needed
Preparing Cake Batter
Now that you have all your ingredients and necessary equipment ready, it’s time to start creating a delicious cake batter. Here are some essential steps to follow:
1. Preheat the oven as per the recipe’s instructions.
2. Grease your baking pan or sheet with some cooking spray or butter and dust lightly with flour.
3. Place the dry ingredients (flour, sugar, baking powder) in a mixing bowl and mix them.
4. Add the wet ingredients (milk/buttermilk, eggs, butter/oil, vanilla extract) into the mixing bowl and combine until smooth.
5. Beat the mixture using an electric mixer if you have one.
6. Ensure that there are no lumps in the mixture and that all ingredients are combined well.
7. Pour the batter into your prepared baking pan, place it in the oven, and bake according to the recipe’s instructions.
One easy tip for cake consistency is mixing your dry ingredients together first before adding wet ingredients to ensure that everything is well mixed with even distribution of each ingredient.
Baking the Cake
Once the cake is done baking, follow these steps:
1. Remove the cakes from the oven (they should be golden brown and a toothpick or cake tester should come out clean).
2. Allow your cake to cool completely before starting any further steps.
3. Once it has cooled down, place it on a flat surface and crumble it into small pieces so that there are no large chunks.
Finally, mix your frosting or icing with the crumbled-up cake until it forms a dough-like consistency.
Crumbling The Cake and Mixing With Icing
After you’ve baked your cake and let it fully cool down, start to break up the cake into small pieces using a fork or fingers until you achieve a consistent crumb texture.
For perfect icing, cream butter or cream cheese with powdered sugar until they are light and fluffy before adding other flavors like vanilla extract or lemon juice use a hand mixer for best results.
Mix this frosting/icing with cake crumbs using a spatula to form dough-like consistency which can quickly be rolled into balls.
Forming The Cake Balls
Divide the mix into equal portions (desired size), use an ice cream scoop or spoon for accuracy when measuring amounts of batter for each ball, then roll them into balls-mindful not leaving any gaps between crumbs.
For consistency, try using a cookie scoop for equally sized portions. Flattening the mixture into a square, then using a ruler or toothpick to slice it diagonally into two triangles before rolling them one at a time can also create more stylish cake balls.
Inserting Sticks and Chilling Cake Pops
Next step- inserting sticks. This is a stage that needs careful attention from the baker as there should be no crumbs falling apart while fixating the sticks. Follow these steps:
1. Dip the tip of one of your sticks in chocolate or frosting and insert straight into the center of your cake ball.
2. Repeat with all cake balls then carefully place them on a tray or stand and chill in the freezer making sure they are upright for about fifteen minutes to thirty minutes before next coating.
Using an ice cream tub to store the cake pops upright as they chill can help maintain their shape.
Coating Options and Techniques
The perfect cake pop comes down to the final coating, always resulting in glorious decorations. Different kinds of coatings can be used depending on preference:
Dipping chocolate: Melted chocolate chips combined with coconut oil usually preferred because of their flavor consistency.
Candy melts: Coating candy melts for bright colors during special events like Halloween, Christmas and Easter).
Royal icing: Buttercream frosting i.e., gentle cream cheese flavorings intended for elegance at formal events
Dip each ball smoothly (holding onto stick) into melted chocolate or coating of choice, swirl and tap off any excess, transfer pops upside down onto parchment paper until coating sets.
Decorating Your Cake Pops
Now it’s time to get creative! Using various decorating designs such as glitter sprinkles, edible pearls, is where you let your imagination run wild. The “less is more” rule often applies to cake pop decorations unless otherwise required.
Some tool options for decorating cake pops include edible glitter, food markers, and colored frosting or icing pens.
Packaging and Storage Tips
The beauty of cake pops is they can be presented in a stylish way. Consider wrapping them up with clear cellophane paper which accentuates the cake ball shape, tied with pretty ribbons and tags. Here are some tips to keep in mind while packaging your cake pops:
1. Once you’ve decorated your cake pops, let them dry before serving or packing.
2. Use wax paper when wrapping them so that they don’t stick to each other or the cellophane bag.
3. Ensure you use a dry environment for packaging to avoid any moisture from making the cake pop soggy.
4. Store them in the refrigerator if it’s hot out or freeze them for long term storage ensuring quality maintenance.
Troubleshooting Errors in Cake Pop Preparation
Even after carefully following instructions problems may still happen. Here are some common errors that could crop up and possible solutions:
Cracking Coating:
- This may sometimes happen when coating is done all at once after too many pops have been chilling awhile and left on the side for way too long making them too cold.
Solution: Rather than dipping all of them in one go, try rotating batches and warming each bath over hot water to a pliable consistency continually.
Sticky Hands:
- Chilling balls before inserting sticks usually over-chills the batter causing it to sweat making it hard to hold.
Solution: Let cake balls sit at room temperature until they’re done reflecting any coolness signs before sticking the handles
Conclusion
Cake pops are a fun and delicious treat that anyone can make at home, given the right ingredients, tools, and instructions. Homemade cake pops add a personal touch because you get to customize them to your preference. As you have learned today, the secret to making great cake pops lies in preparation, technique, and decoration. Following the steps mentioned earlier in this guide guarantees perfect made cake balls for any occasion. Have fun experimenting and discovering new tips along the way!
Frequently Asked Questions (FAQs) about Cake Pop Recipe
1. What are cake pops?
A: Cake pops are a bite-sized dessert made of crumbled cake mixed with frosting, molded into balls, and attached to a stick or lollipop stick. They are perfect for parties, special occasions, and as gifts.
2. What ingredients do I need for a basic cake pop recipe?
A: To make basic cake pops, you will need cake mix, frosting, candy melts or chocolate chips, lollipop sticks, and sprinkles or other decorations. You can add other flavorings such as extract or liqueur to enhance the taste of your cake pops.
3. How do I make cake pops?
A:
- Crumble your baked cake into fine crumbs using your hands or a food processor.
- Mix the crumbled cake with frosting until it forms a dough-like consistency that you can mold into balls.
- Roll the dough into balls using your hands, then insert a lollipop stick into each ball.
- Dip each ball into melted candy melts or chocolate chips until fully coated and tap off any excess coating.
- Add sprinkles or other decorations while the coating is still wet.
- Place on a wax paper-lined baking sheet to dry and set in the refrigerator until ready to serve.
4. Can I make cake pops ahead of time?
A: Yes! You can make your cake pops ahead of time and store them in an airtight container in the refrigerator for up to three days. You can also freeze them for up to two weeks. Just make sure to let them come to room temperature before serving.
5. What are some tips for making perfect cake pops?
A:
- Bake your cake a day ahead and let it cool completely before making your cake pops.
- Use high-quality chocolate or candy melts that are specifically made for coating desserts.
- Don’t overmix the cake crumbs and frosting, or else it will be too wet and difficult to shape into balls.
- Let the coated cake pops dry completely before adding any decorations or packing them in a container.
Now that you have all the necessary information about cake pop recipe, it’s time to get creative and make your own delicious treats! Happy baking!