
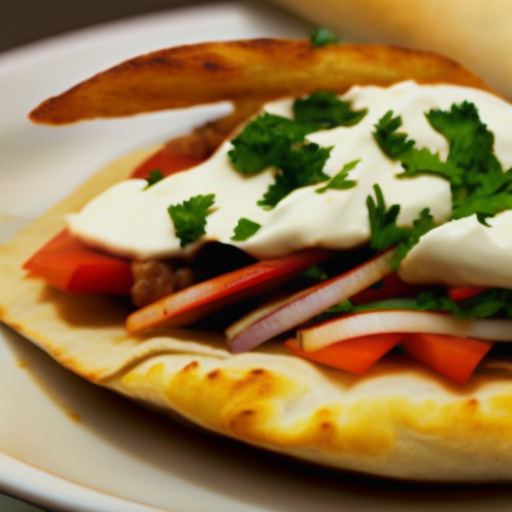
Making Delicious and Fluffy Pita Bread at Home
Pita bread is a type of flatbread that is widely used in Middle Eastern cuisine. It differs from the regular flatbreads as it makes a pocket inside, making it more versatile for sandwiches and dips. Although it can be found in most supermarkets, making your own homemade pita bread can be an exciting and rewarding experience for any baker.
Introduction
The history of pita bread dates back to ancient times, around 12,000 BCE. It was introduced in the Middle East region and has since been an essential part of their cuisine. Pita bread comes in various flavors and sizes; it is delicious when stuffed with meat, vegetables, or hummus dips. The benefits of making your pita bread are numerous; it’s cheaper, healthier, and helps you improve your baking skills.
This article will guide you on how to make fluffy and delicious pita bread in the comfort of your kitchen.
Ingredients
- 3 cups all-purpose flour (plus additional for dusting)
- 1 tablespoon sugar
- 2 teaspoons salt
- 1 tablespoon active dry yeast
- 1 ¼ cups warm water
- 2 tablespoons olive oil
You may interchange the all-purpose flour with whole wheat flour for a healthier version, use honey instead of sugar, and vegetable oil instead of olive oil.
Tips:
- Baking is like chemistry; measure all ingredients carefully to get the best results.
- The flour should be sifted before use to get rid of any lumps that could interfere with the dough formation.
Kitchen Equipment
- Mixer with dough hook attachment or mixing bowl
- Large mixing spoon or wooden spatula
- Baking stone or large baking sheet
- Parchment paper
- Rolling pin
If you don’t have a mixer, use a large mixing bowl and knead the dough by hand. You can use any baking sheet in place of a baking stone and cooking spray instead of parchment paper.
Tips:
- To get consistent results, always use the same equipment for baking your pita bread.
- If you are trying out new equipment, first do a test run before making your pita bread.
Preparing the Dough
Here are the detailed steps to preparing your dough:
- In a large mixing bowl, combine flour, sugar, salt, and yeast. Mix.
- Add olive oil and warm water. Using a mixer add the dough hook attachment and mix on low speed for two minutes until the dough becomes elastic and smooth. On the other hand, if you’re using your hands, mix with a wooden spatula until they come together.
- Place the dough on a lightly floured surface and knead it for about 10 minutes until it becomes smooth and shiny.
- Place your dough in an oiled bowl, cover it with cling film or tea towel, then let it rest in a warm place for at least an hour or until it doubles in size.
You can add some garlic or herbs like thyme to your dough mixture to give your pita an extra kick of flavor.
Tip: Make dough in batches and store it in the fridge or freezer for later use.
Correct Baking Techniques
Baking your pita bread can be done either on a stovetop, oven, or grill. Each method will provide you with a different texture and flavor.
To bake your pita on the stovetop:
- Preheat your skillet on medium-high heat; let it get hot before cooking.
- Divide the rested dough into 8 to 10 portions or as desired, then roll each piece out to 1/4 inch thickness.
- Cook each circle for about 30 seconds on each side; you’ll notice pockets start to form at the top of the bread.
- Pile on top of each other and wrap them with foil or place them in an airtight bag to keep them warm.
To bake your pita in the oven:
- Preheat your oven to 500 degrees Fahrenheit with a baking stone inside the oven. Allow it to heat for at least 30 minutes.
- Divide the rested dough into 8 to 10 portions, then roll each piece out to ¼ inch thickness.
- Place one or two rolled-out pieces of bread at a time onto the preheated baking stone. Cook for two minutes until they puff up like balloons and become golden brown.
- Alternatively, use a baking sheet instead of a baking stone but line them with parchment paper first.
Tips:
- Rolling out the dough evenly is crucial; otherwise, they will bake unevenly or won’t form pockets.
- Expect your pita bread to puff up, so be ready with a spatula to remove it from the oven if necessary.
Storing Fresh Pita Bread
Proper storage of your fresh pita bread is crucial as it ensures they remain fresh for longer periods without getting soggy.
To store your freshly baked pita:
- Wrap them in a tea towel or foil and leave at room temperature.
- To keep for more than five days, store them in an airtight plastic bag in the fridge.
To freeze your pita:
- Cool the freshly baked pita bread to room temperature.
- Stack them on top of each other and place them inside an airtight freezer bag.
- When you’re ready to use them, defrost in a microwave and then place them in a preheated oven for 5-10 minutes until heated thoroughly or at 350 F oven temperature for 10-15 minutes.
Tips:
- Avoid storing your pita bread in the fridge or freezer, straight from the oven; allow cooling first as this could cause condensation hence making it soggy.
- If you’re reheating frozen pita, spray some water on it before placing them in the oven to prevent it from drying out.
Enjoying Your Pita Bread
Pita bread can be enjoyed with various spreads, dips, or fillings. You can serve it with hummus, falafel, baba ganoush, or even slice it up for a sandwich.
Here are some ways to enjoy your Pita Bread:
- Spread avocado cream and smoked salmon
- Slice it in half and fill it with falafel, fresh veggies or cheese.
- Use it as a substitute for pizza dough.
Tips:
- Pita bread is highly versatile, and so you can get creative with different flavors and ingredients.
- Incorporate pita bread into traditional cuisine such as kebab wraps, shawarmas, or gyros to spice them up.
Troubleshooting Challenges
Baking Pita bread can be challenging, but knowing how to troubleshoot could save those pitas from going in the trash.
Common issues when making pita include:
- Dough failing to rise adequately: This could be due to inactive yeast or improperly mixed ingredients. Ensure the yeast is fresh and active, measure the ingredients correctly and mix well.
- Pockets not forming uniformly: Not rolling out the dough evenly can lead to thicker parts that won’t rise and may create uneven pockets.
- Pitas not browning properly: If pitas aren’t browning properly after baking, they may have not been cooked long enough; another possible cause is an oven temperature that was too low.
Tips for Advanced Bakers
If you’re an experienced baker looking to take your pita game up a notch, here are some advanced tips:
- Fill your pita with grilled meats or roasted vegetables for added flavor.
- Use sourdough starter instead of active yeast to give the pita a unique flavor and make it healthier.
- Add different spices or herbs like cumin, coriander, basil, or paprika to enhance the taste profiles.
Frequently Asked Questions
Q: Can I make my pita bread ahead of time?
Yes, you can make your pita bread ahead of time, then store them in a plastic bag or container for future use.
Q: Can you freeze pita bread dough?
Yes, you can freeze your pitas’ dough for up to three months in an airtight container. To defrost, let it rest in the fridge overnight and bring it to room temperature before baking.
Q: Is pita bread healthy?
Pita bread is relatively healthy and has less fat than most bread. Whole wheat pita bread provides a healthy amount of fiber, protein, and other nutrients.
Safety Considerations
Baking your own pita bread requires basic safety measures to avoid injuries or accidents:
- Roll out your dough carefully using proper techniques with a rolling pin.
- If cooking on stovetop range burners please be careful around open flames.
- If using an oven, wear protective gloves to remove hot pans from inside the oven.
Conclusion
Baking homemade fresh Pita Bread is an excellent way of exploring Middle Eastern cuisine while letting your creativity flow. There are endless ways of making this versatile type of bread; the key is getting the ingredients right and the technique down pat. With this guide, you’re sure to impress your family and guests with fluffy and flavorful pita bread.
Final Thoughts
Making pita bread is a journey. It requires time, patience, and trial-and-error to get the perfect results. Don’t forget always to measure your ingredients correctly, shape your dough evenly and have fun with different flavor combinations.
Tip: Learning how to bake pita bread not only saves you money but is also cheaper than most healthier alternatives like gluten-free bread. So why not add in a new recipe while keeping the healthy streak.
Frequently Asked Questions about Pita Recipe
1. What ingredients do I need to make pita bread?
You will need the following ingredients:
- 4 cups of all-purpose flour
- 2 teaspoons salt
- 1 tablespoon sugar
- 1 packet of instant yeast (about 2¼ teaspoons)
- 1¼ cups warm water (110°F to 115°F)
- 3 tablespoons olive oil
2. Can I make pita bread without a bread machine?
Absolutely! The recipe can be made by hand or with a stand mixer with a dough hook attachment.
3. Do I need a pizza stone or baking steel to make pita bread?
No, you do not need a pizza stone or baking steel. You can use a baking sheet or even a cast-iron skillet to bake the pita bread in the oven.
4. Can I store leftover pita bread, and if so, how long will it last?
Yes, you can store leftover pita bread in an airtight container for up to three days at room temperature or up to one week in the refrigerator. To reheat, wrap the pita in foil and heat in a 350°F oven for about ten minutes.
5. Can I freeze pita bread?
Absolutely! Once cooled to room temperature, wrap the pita bread tightly in plastic wrap and place in an airtight container or freezer bag and freeze for up to three months.